The Pain Cave
How to Set Up a Smart Trainer
From box to first interval. The order to do it in, the parts nobody tells you you need, and the five setup mistakes that turn day one into a wasted evening.
The short answer
Quick picks
| # | Product | Best for | Score | Price |
|---|---|---|---|---|
| 1 | 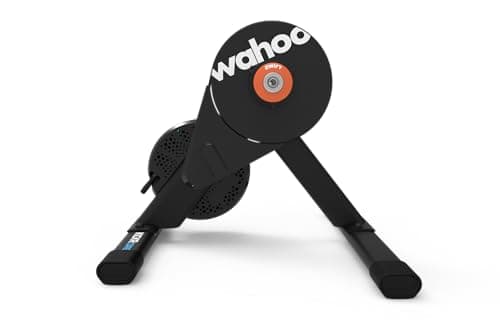 Wahoo Kickr Core 2 The trainer to build a first proper setup around: direct drive, well-documented, and forgiving of the mistakes everyone makes on day one. | The trainer most of these steps assume | 8.68.6 out of 10 | $549.99 · View on Amazon #ad We may earn a commission · Price as of October 22, 2026 |
| 2 | 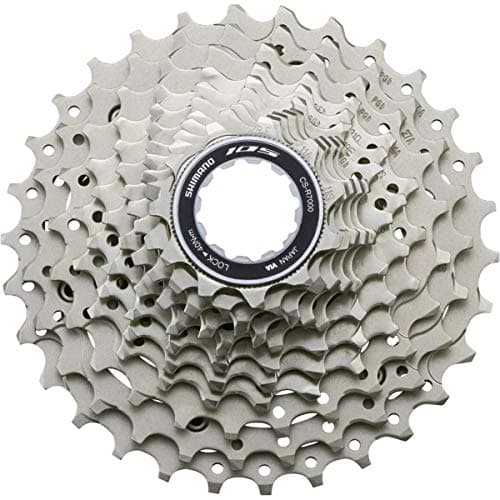 Shimano 105 CS-R7000 Cassette The default cassette for an 11-speed setup — match the speed count and the ratio to your road wheel and shifting will feel identical. | The cassette most 11-speed bikes need | 8.08.0 out of 10 | |
| 3 | 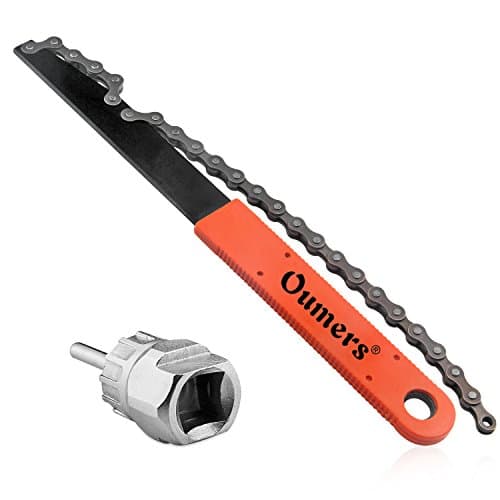 Oumers Cassette Removal Tool Kit Two cheap tools that turn a shop visit into a ten-minute job — and the reason most trainer cassette advice assumes you own them. | The two tools you cannot fit a cassette without | 7.67.6 out of 10 | $12.99 · View on Amazon #ad We may earn a commission · Price as of October 22, 2026 |
| 4 | 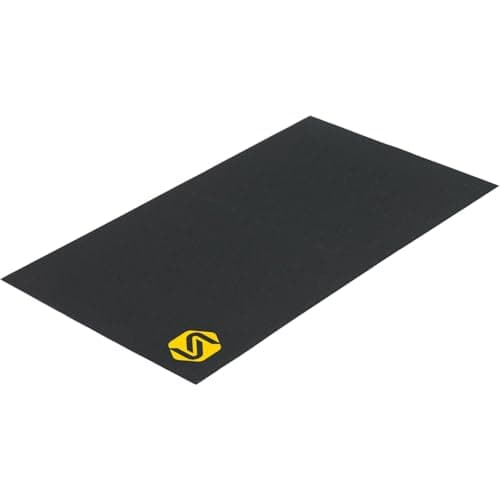 Saris Trainer Mat The one accessory to have in place before the first pedal stroke, because the alternative is finding out about sweat the hard way. | Do this before the first ride, not after | 8.88.8 out of 10 | $79.99 · View on Amazon #ad We may earn a commission · Price as of October 22, 2026 |
| 5 | 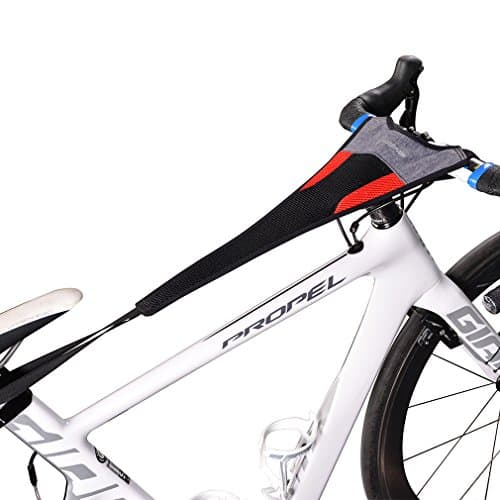 ROCKBROS Bike Trainer Sweat Net The cheapest insurance policy in indoor cycling — buy it with the trainer, not after the headset has already gone. | Protecting the bike from your own sweat | 8.48.4 out of 10 | $11.99 · View on Amazon #ad We may earn a commission · Price as of October 22, 2026 |
A smart trainer is not hard to set up, but it has more steps than the box implies and at least two of them need parts that do not come with it. The classic first evening involves unpacking a trainer, discovering you need a cassette, discovering you need two tools to fit the cassette, and going to bed. This page exists so that does not happen to you.
The order below is deliberate. Do it in this sequence and nothing has to be undone.
Step 1: Put the mat down first
Position the mat where the setup will live permanently, and build everything on top of it. Retrofitting a mat under an assembled trainer and bike is annoying enough that most people never do it, and the sweat and vibration problems start on ride one. If you live above someone, put interlocking foam tiles under the mat as well — the combination is what actually stops vibration reaching the floor below. Our apartment setup guide covers the full floor stack.
Step 2: Work out what your rear axle is
Before anything else, look at your rear wheel. A quick release has a lever and a thin skewer running through a hollow axle. A thru-axleis a thick bolt that threads directly into the frame, and it comes in different diameters, lengths and thread pitches — 142 x 12 mm is the common road standard, but the thread pitch varies by frame manufacturer.
Direct-drive trainers ship with a set of adapters, and they cover most bikes. They do not cover all bikes. If yours is thru-axle, check your frame manufacturer's specification against the adapter list before the trainer arrives, because the alternative is a trainer you cannot mount.
If the axle standard is anything other than a 130 mm quick release or a 12 x 142 thru-axle, check it against smart trainer thru-axle compatibility before going further — it lists which widths each maker ships adapters for, which are accessories, and the frames Wahoo says do not fit at all.
Step 3: Fit the cassette
If your trainer came with a cassette fitted and it matches your drivetrain, skip to step four. If it came bare, or with a cassette of the wrong speed count, you are fitting one.
The rule that matters: the cassette must match the number of speeds your chain and shifters use. An 11-speed chain on a 12-speed cassette will not index and will wear both parts. Count the sprockets on your rear wheel if you are not sure.
The rule that matters almost as much: match the ratio to your road wheel. If your outdoor cassette is 11-28 and your trainer cassette is 11-32, every gear will feel slightly different indoors, which is a small persistent irritation you can simply avoid at purchase.
Fitting itself is straightforward once you have the tools. Slide the sprockets onto the freehub body — the splines are asymmetric so it only goes on one way — keeping any spacers in the order they came out, then thread the lockring on and tighten it firmly with the lockring tool. There is no chain whip needed for fitting, only for removal. Full options in our cassette guide.
Step 4: Mount the bike and level it
Remove the rear wheel, fit the correct adapters to the trainer, and mount the bike, making sure the chain sits over the cassette before you tighten anything. Tighten the axle or skewer firmly — a loose mount creaks and wanders.
Then check the bike is level. Removing the rear wheel and dropping the frame onto a trainer usually leaves the bike nose-up by a small amount, which changes your saddle-to-bar drop and shifts your weight backwards on the saddle. Over an hour that is a genuine comfort difference. A front wheel riser block fixes it, and a block with adjustable heights lets you match your outdoor position properly rather than approximately.
| Step | What you need | Skip it and |
|---|---|---|
| Position the mat | Trainer mat, optional foam tiles | You lift everything again later |
| Identify the axle | Nothing — just look | The trainer will not mount |
| Fit a cassette | Cassette, lockring tool, wrench | Nothing shifts properly |
| Mount and level the bike | Adapters, riser block | Your position is nose-up all winter |
| Update firmware | Manufacturer app | Pairing and ERG behave oddly |
| Pair to the app | Phone, tablet or computer | No control, power-only readings |
| Calibrate | 10 minutes of riding | Your power numbers drift |
| Fit the sweat guard | Sweat guard and a towel | Corroded bolts by spring |
Step 5: Update the firmware before you pair anything
Install the manufacturer's app, connect to the trainer, and let it update. Do this first, because a large share of the "my trainer will not connect" and "ERG mode feels wrong" problems people report are on out-of-date firmware, and because updating after you have paired to a training platform sometimes means re-pairing anyway.
Keep the phone close to the trainer during the update and do not let the screen sleep. An interrupted firmware update is one of the few ways to genuinely brick a trainer.
Step 6: Pair to your training platform
In Zwift, TrainerRoad or whatever you are using, pair the trainer as the power source and as the controllable trainer. Those are two separate pairings and both matter — controllable is what lets the app change your resistance for climbs and ERG intervals. Pairing only the power source is the single most common reason someone reports that "the resistance never changes."
If your trainer has WiFi, use it. It removes the phone or laptop from the data path entirely and eliminates the most common failure mode in indoor cycling. If it does not, and your setup is crowded with Bluetooth devices, an ANT+ USB adapter is a cheap and very effective fix. Anything that goes wrong here is covered in connection troubleshooting.
Step 7: Calibrate, properly
If your trainer uses a spindown, ride easily for about ten minutes first. Calibration on a cold trainer is worse than no calibration, because the belt tension and bearing drag are both different when warm — which is exactly what a spindown measures. Then run the routine from the app and let it finish.
Flagship trainers with automatic calibration skip this entirely. Everything else wants it repeated every few weeks, and any time the trainer has been moved or the room temperature has changed significantly. The detail is in how to calibrate a smart trainer.
The five mistakes everyone makes
Buying the wrong cassette. Count your sprockets before ordering, and match the ratio to your road wheel while you are at it.
Forgetting the lockring tool needs a wrench. The kit gives you the splined tool; turning it is your problem.
Calibrating cold. Ten minutes of easy riding first, every time.
Pairing only the power source. Pair controllable as well, or nothing will change resistance.
Riding without a fan. Heat ends indoor rides sooner than legs do, and a desk fan is not a fan. Our fan roundup is the fix, and the complete build across every budget is in the best indoor cycling setup.
If your trainer supports virtual shifting you can skip the cassette step entirely — Zwift Cog vs cassette covers what that changes and what it costs.
The full reviews
Every pick, in detail
#1 · The trainer most of these steps assume
Wahoo Kickr Core 2
8.68.6 out of 10#ad We may earn a commission · Price as of October 22, 2026
The trainer to build a first proper setup around: direct drive, well-documented, and forgiving of the mistakes everyone makes on day one.
- Type
- Direct drive
- Claimed accuracy
- ±2%
- Max resistance
- 1,800 W
- Calibration
- Spindown
- Axle support
- Quick release and thru-axle adapters
- Cassette
- Sold in cassette and cog versions
What we'd praise
- Direct drive, so no tire wear, no roller tension to set and far less noise
- Ships with adapters covering the common quick-release and thru-axle standards
- Mature firmware and a straightforward app-based update and spindown routine
- The reference value trainer — the one most setup advice is written around
What we'd flag
- Spindown calibration is a step you have to remember, unlike auto-calibrating flagships
- Rigid feet transmit vibration into the floor, so plan for a mat
- Which cassette or cog arrives depends on the version you order — check before you buy
Most of the steps below apply to any direct-drive trainer, but the Kickr Core 2 is the unit they were written around because it is the one most people buy at this stage. It uses a spindown calibration rather than the automatic routine on the flagships, which means it has one more setup step than a Kickr v6 — and that step is the one people skip.
Check which version you are ordering. Wahoo and other brands now sell direct-drive trainers both with a fitted cassette and in cog-based virtual-shifting versions, and that decides whether the drivetrain steps below apply to you at all. Full detail in our Kickr Core review.
#2 · The cassette most 11-speed bikes need
Shimano 105 CS-R7000 Cassette
8.08.0 out of 10The default cassette for an 11-speed setup — match the speed count and the ratio to your road wheel and shifting will feel identical.
- Speeds
- 11
- Group level
- 105
- Freehub
- Shimano HG
- Use
- Fits directly to a direct-drive trainer freehub
- Matching
- Must match your chain's speed count
- Why it matters
- Mismatched speeds shift badly and wear the chain
What we'd praise
- Matches the drivetrain on a very large share of road bikes still in use
- 105-level build is the sweet spot of durability against price for a cassette that never leaves the trainer
- Fitting it to the trainer means you never touch your road wheel again
- Available in several ratios, so you can match your outdoor gearing exactly
What we'd flag
- Must match your chain speed count — an 11-speed chain on a 12-speed cassette will not work properly
- Fitting needs a lockring tool and a chain whip you may not own
- The wrong ratio will make your indoor gearing feel different from your outdoor bike
Direct-drive trainers replace your rear wheel, which means they also need a cassette. Some ship with one fitted, some ship bare, and some ship with a single cog for virtual shifting. If yours needs one, the rule is simple and unforgiving: the cassette must match the number of speeds your chain and shifters are built for.
The second rule is worth following even though nothing breaks if you ignore it — match the ratio to your outdoor cassette. If your road wheel is 11-28 and your trainer cassette is 11-32, every gear indexes to a slightly different ratio and your indoor cadence at a given speed will feel wrong. Buying the same ratio makes the two setups interchangeable. Our cassette guide covers 12- speed and SRAM options.
#3 · The two tools you cannot fit a cassette without
Oumers Cassette Removal Tool Kit
7.67.6 out of 10#ad We may earn a commission · Price as of October 22, 2026
Two cheap tools that turn a shop visit into a ten-minute job — and the reason most trainer cassette advice assumes you own them.
- Includes
- Chain whip and lockring tool
- Compatibility
- Shimano HG-pattern lockrings
- Also needs
- An adjustable wrench or large socket
- Use
- Fitting and removing cassettes
- Frequency
- Once at setup, then rarely
- Alternative
- A bike shop fitting, for about the same money
What we'd praise
- The cheapest possible route to fitting your own cassette, and you keep the tools
- Also lets you swap the cassette back and forth between wheel and trainer
- Same tools service your road wheel, so nothing here is single-use
- Pays for itself against a single shop visit
What we'd flag
- You still need an adjustable wrench or large socket to turn the lockring tool
- Budget chain whips flex under load; go slowly and keep the chain seated
- Lockrings are tightened hard from the factory — expect the first removal to be a fight
A cassette is held on by a threaded lockring, and removing it needs two things at once: a splined lockring tool to undo the ring, and a chain whip to stop the cassette rotating while you do. Neither is expensive and both live in a toolbox forever afterwards.
The one thing nobody warns you about is that the lockring tool needs something to turn it — an adjustable wrench or a large socket. If you buy the kit and nothing else, you will get halfway through and stop. The other warning: factory lockrings are tight, so brace the wheel or trainer properly and use steady force rather than a sudden jerk.
#4 · Do this before the first ride, not after
Saris Trainer Mat
8.88.8 out of 10#ad We may earn a commission · Price as of October 22, 2026
The one accessory to have in place before the first pedal stroke, because the alternative is finding out about sweat the hard way.
- Job
- Vibration, sweat and floor protection
- Material
- Dense rubber
- Placement
- Under the whole bike and trainer
- Also does
- Stops the trainer creeping on smooth floors
- Care
- Wipe down after each session
- Pairs with
- Interlocking foam tiles underneath
What we'd praise
- Decouples the trainer from the floor, which is what stops vibration reaching a room below
- Catches sweat before it reaches carpet, laminate or a garage floor
- Marks the trainer's position so the setup goes back in exactly the same place
- Cheap relative to everything else in the build
What we'd flag
- Does nothing for airborne noise — a chain still rattles across a room
- Occupies its footprint permanently, which matters in a small space
- Needs cleaning or it becomes the defining smell of the room
Put the mat down before you build the trainer on top of it, not after. Retrofitting a mat means lifting a heavy trainer and a bike, and most people simply do not bother — which is how a laminate floor acquires a permanent sweat shadow.
It solves three problems at once: it decouples the trainer feet from the floor so vibration does not travel into the building, it catches the genuinely surprising volume of sweat an indoor rider produces, and it gives the trainer a consistent, grippy surface so it does not walk across smooth flooring. The full field is ranked in our trainer mat roundup.
#5 · Protecting the bike from your own sweat
ROCKBROS Bike Trainer Sweat Net
8.48.4 out of 10#ad We may earn a commission · Price as of October 22, 2026
The cheapest insurance policy in indoor cycling — buy it with the trainer, not after the headset has already gone.
- Job
- Catches sweat before it reaches the frame
- Fit
- Bars to seatpost
- Protects
- Headset, stem bolts, top tube, bottom bracket
- Care
- Machine washable
- Fitting time
- Seconds
- Why it matters
- Indoor sweat is corrosive and lands on the frame
What we'd praise
- Stops the single most damaging thing about indoor riding — sweat falling directly onto the headset and bolts
- Costs a fraction of a headset service, let alone a seized stem bolt
- Fits in seconds and comes off just as fast
- Washable, which matters more than it sounds after a month
What we'd flag
- Covers the part of the top tube where a bar-mounted phone or computer might sit
- Does nothing for sweat that runs down your legs to the bottom bracket
- Another thing to remember to wash
Outdoors, sweat is carried away by moving air. Indoors it falls straight down, and what it falls onto is your stem bolts, your headset bearings, your top tube and eventually your bottom bracket. It is salty and it is corrosive, and a winter of unprotected indoor riding does real, expensive damage that only shows up when a bolt will not move.
A sweat guard spans the bars to the seatpost and catches the worst of it. Combine it with a towel over the bars and a wipe-down of the frame after every session and the problem effectively disappears. It is on our accessories checklist for exactly this reason.
Good questions
Frequently asked questions
Do smart trainers come with a cassette?
Some do and some do not, and an increasing number ship with a single cog for virtual shifting instead. Check the specific version you are ordering. If it needs a cassette, it must match the number of speeds your chain and shifters use, and ideally the same ratio as your road wheel.
What tools do I need to fit a cassette to a smart trainer?
A splined lockring tool and something to turn it, such as an adjustable wrench or a large socket. A chain whip is only needed for removing a cassette, not fitting one, but it is worth owning since the same tools service your road wheel.
Do I need a front wheel riser block with a direct-drive trainer?
Usually yes. Removing the rear wheel and dropping the frame onto a trainer typically leaves the bike nose-up, which shifts your weight backwards on the saddle and changes your bar drop. A riser block with adjustable heights lets you match your outdoor position rather than guessing.
Why does my trainer not change resistance on climbs?
Almost always because it is paired as a power source but not as a controllable trainer. Those are two separate pairings in Zwift and most other platforms. Pair both, and check that only one app is trying to control the trainer at a time.
How long should I warm up before calibrating a smart trainer?
About ten minutes of easy riding. A spindown measures how long the flywheel takes to slow, which depends on belt tension and bearing drag, and both change as the unit warms up. Calibrating cold gives a baseline that does not match the conditions you actually ride in.
Should I update trainer firmware before or after pairing to Zwift?
Before. A large share of connection and ERG-behavior complaints turn out to be out-of-date firmware, and updating after pairing sometimes forces you to pair again. Install the manufacturer's app first, update, then pair to your training platform.
How we sourced this
Keep going