The Pain Cave
Build Your Pain Cave: The Complete Indoor Cycling Setup
A trainer is only a quarter of a setup. Here's how the whole room comes together at budget, mid and dream tiers — and the one line on the list that changes a session more than any trainer swap.
The short answer
Quick picks
| # | Product | Best for | Score | Price |
|---|---|---|---|---|
| 1 | 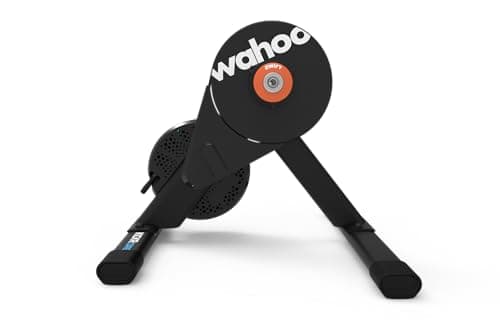 Wahoo Kickr Core 2 The trainer we'd build the whole room around: most of the flagship ride for meaningfully less. | The trainer | 9.09.0 out of 10 | $549.99 · View on Amazon #ad We may earn a commission · Price as of October 21, 2026 |
| 2 | 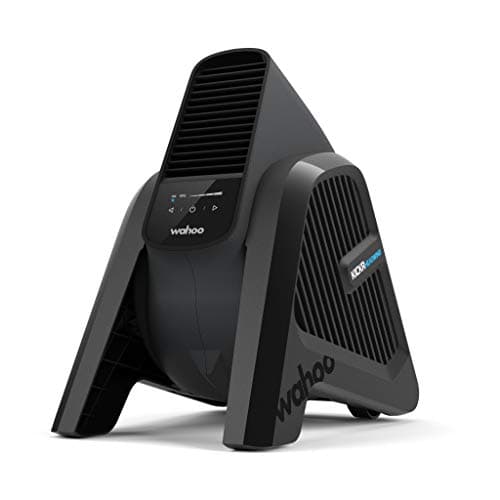 Wahoo Kickr Headwind The upgrade that changes a session more than any trainer swap — cooling is the real limiter indoors. | The fan | 8.68.6 out of 10 | $319.99 · View on Amazon #ad We may earn a commission · Price as of October 21, 2026 |
| 3 | 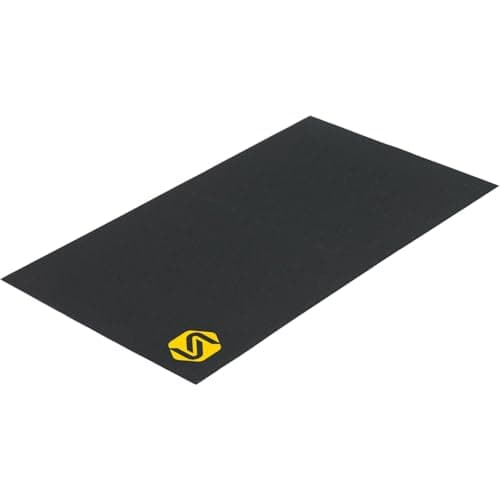 Saris Trainer Mat The cheap-insurance layer under the whole build: sweat protection, noise damping, and a defined footprint. | The mat | 8.38.3 out of 10 | $79.99 · View on Amazon #ad We may earn a commission · Price as of October 21, 2026 |
Almost everyone builds a pain cave in the wrong order. They spend the whole budget on the trainer, bolt the bike to it in a bare corner of the garage, ride it hard twice, and then quietly stop — because the room is hot, loud, and about as inviting as a dentist's waiting area. The trainer was never the problem. A complete indoor setup is really five things working together: the trainer, a fan that actually moves air, a mat, a screen and the device that drives it, and the sensors that feed the software. Get the balance right and you ride all winter. Get it wrong and you own an expensive clothes rack.
This is the whole-room version of the story. If you just want the trainer shortlist, our best smart trainersroundup ranks the field on the specs. Here we're spending the same money across the entire setup, and being honest about which lines matter and which you can cheap out on. As always, we don't run a lab — we compiled the published specs and did the math, and we say so plainly on our how we review page.
The five things a complete setup needs
Before the tiers, the anatomy. Every worthwhile pain cave, from a spare-bedroom starter to a dedicated dream room, is built from the same five parts. What changes across tiers is how much each one costs — not whether it exists.
- The trainer.The thing your bike bolts to. A controllable smart trainer lets software set your resistance, which is what makes structured workouts and virtual worlds work. This is the biggest single line, and also the one where spending more returns the least once you're past the entry tier.
- The fan.Cooling. Indoors there's no headwind carrying your heat away, so a fan isn't comfort — it's the difference between holding your numbers and watching them sag. The most underrated line on the list, every single time.
- The mat. Sweat protection, noise damping, and a defined footprint. Cheap insurance for your floor, your bike, and your relationship with anyone in the room below.
- The screen and device. Something to run the software on and something to watch it on. This can be a phone you already own or a wall-mounted TV with an Apple TV behind it — the range here is enormous, which is good news for a budget build.
- The sensors. A cadence sensor and a heart-rate strap. A smart trainer already broadcasts power, so these are the cheap finishing touches that complete the data picture rather than the foundation.
Where to spend, where to save
Here is the whole philosophy in one paragraph. Spend on the fan and the screen first, because those are what get you into the room and keep you there. Buy a good-enough trainer, not a flagship — the jump from entry to mid-tier is huge and the jump from mid-tier to flagship is a rounding error you feel in your wallet, not your legs. Save on the mat and the sensors, where a generic rubber mat and a basic cadence sensor do 90% of the job of the branded versions. The single most common build mistake is a flagship trainer sitting in a hot, bare room with a phone propped against a water bottle. Invert that and you have a room you'll actually use.
The other honest note: the trainer is where the marketing shouts loudest and matters least past a point. Claimed accuracy of ±2% is plenty for training by power; repeatability matters more than the last decimal. Read our trainer roundupif you want the full case, but don't let a spec sheet talk you into spending the fan money on watts you can't feel.
The three tiers, side by side
The same five parts, scaled three ways. These are qualitative tiers, not price tags — components and live prices change constantly, so think of this as where each dollar goes rather than what any of it costs today.
| Component | Budget build | Mid build | Dream build |
|---|---|---|---|
| Trainer | Entry direct-drive or good wheel-on | Mid-tier direct-drive (Kickr Core 2) | Flagship direct-drive (Kickr v6 / Neo) |
| Fan | A sturdy household pedestal fan | One dedicated cycling fan | Smart fan plus a second pedestal fan |
| Mat | Generic rubber gym mat | Purpose-made trainer mat | Premium trainer mat |
| Screen / device | A phone or tablet you already own | Dedicated tablet or Apple TV on a stand | Wall-mounted TV plus Apple TV |
| Sensors | Trainer's built-in power only | Cadence sensor plus heart-rate strap | Cadence, heart rate, plus a desk and lighting |
The budget build
The goal of a budget build is to get riding well without spending on anything you can borrow from the house. Start with an entry direct-drive trainer or a well-reviewed wheel-on unit — our budget trainer picks are the place to start, and the best trainer for Zwiftguide covers the cheapest sensible way onto the platform. For cooling, a sturdy pedestal fan from a hardware store pointed at your chest is genuinely most of a Headwind for a fraction of the cost. Use a generic rubber mat, run the software on a phone or tablet you already own propped on a chair, and lean on the power your trainer already broadcasts. A budget build is not a compromised build — it's the same five parts, sourced cleverly.
The mid build
This is where most upgrading riders should land, and it's the build the starter list below is drawn from. The trainer is a mid-tier direct-drive unit — the Wahoo Kickr Core 2is the benchmark, giving up almost nothing to the flagship at training wattages. Add one dedicated cycling fan, because this is the tier where cooling stops being an afterthought. Put down a purpose-made trainer mat, run the software on a dedicated tablet or an Apple TV on a proper stand so you aren't fishing your phone out mid-interval, and finish the picture with a cadence sensor and a heart-rate strap. The mid build is the sweet spot: everything is good enough that the next upgrade is a genuine luxury, not a fix.
The dream build
The dream build is where you stop optimizing for value and start optimizing for the room you want to walk into. The trainer is a flagship direct-drive unit — a Kickr v6 for onboard WiFi and auto-calibration, or a Tacx Neo for the best road feel in the class. Cooling is a smart fan plus a second pedestal fan for the legs, because at this level you're chasing the outdoor sensation. A wall-mounted TV with an Apple TV behind it turns a corner into a cinema, a premium mat defines the space, and the full sensor suite plus a desk and some deliberate lighting make it a place rather than a punishment. None of this makes you faster than the mid build makes you. It makes you want to be in the room, which — over a winter — is its own kind of watts.
The starter build list
If you want a single, no-overthinking answer, here's the mid-tier build we'd put together: a trainer to ride, a fan to survive it, and a mat to protect the floor. It's the 80% build that gets almost everyone where they want to be, and every piece has room to grow around it.
From here, the room fills out with the small stuff — bottles, a towel, a spot for your head unit. Our indoor cycling accessories checklist is the run-through of the finishing items, and once the hardware is down, the Zwift setup guide walks through getting the software talking to all of it.
The full reviews
Every pick, in detail
#1 · The trainer
Wahoo Kickr Core 2
9.09.0 out of 10#ad We may earn a commission · Price as of October 21, 2026
The trainer we'd build the whole room around: most of the flagship ride for meaningfully less.
- Type
- Direct drive
- Claimed accuracy
- ±2%
- Max resistance
- 1,800 W
- Max gradient
- 16%
- Flywheel
- 12 lb
- Connectivity
- WiFi, Bluetooth, ANT+ FE-C
What we'd praise
- The value benchmark direct-drive trainer, and the heart of most sensible builds
- ±2% claimed accuracy is plenty for training by power
- Leaves budget for the fan and screen that make the room usable
What we'd flag
- ±2% claimed accuracy is unchanged from the original Core, so this is a connectivity upgrade rather than an accuracy one
- Needs an occasional manual spindown after big temperature swings
The Core is where we'd spend the trainer half of a first serious build. The 12 lb flywheel and electromagnetic resistance give a ride that's close enough to the flagship Kickr that most riders can't pick them apart at training wattages, and Wahoo's ±2% claimed accuracy is more than steady enough to train by power. You give up onboard WiFi and auto-calibration — a spindown every few weeks, not a dealbreaker.
The reason it anchors this page is simple: buy the Core instead of the flagship and the money you save is exactly what funds a proper fan and a screen — the two things that actually decide whether you keep riding. The full field is in our best smart trainers roundup.
#2 · The fan
Wahoo Kickr Headwind
8.68.6 out of 10#ad We may earn a commission · Price as of October 21, 2026
The upgrade that changes a session more than any trainer swap — cooling is the real limiter indoors.
- Type
- Bluetooth-controlled fan
- Max air speed
- Up to ~30 mph (claimed)
- Control
- Manual, speed, or heart rate
- Airflow shape
- Focused, body-width column
- Power
- Mains (corded)
- Connectivity
- Bluetooth
What we'd praise
- Directs a focused column of air where a rider actually needs it, not a wide gym breeze
- Can ramp automatically with speed or heart rate over Bluetooth
- The single upgrade that most changes how a session feels
What we'd flag
- Premium price for what is, mechanically, a fan
- A good household pedestal fan gets you most of the way for far less
Indoors there's no wind, so the heat you generate has nowhere to go, and your power falls off long before your legs do. A strong, focused fan fixes that more directly than any amount of extra trainer. Wahoo claims the Headwind moves air at up to roughly 30 mph and shapes it into a body-width column rather than a diffuse room breeze, and it can ramp itself over Bluetooth as your speed or heart rate climbs.
Is it mechanically just a fan? Yes. Will a sturdy pedestal fan get you most of the way for a fraction of the outlay? Also yes — and we say so in our fans roundup. But if you buy one thing on this page purely to make the room rideable, cooling is it.
#3 · The mat
Saris Trainer Mat
8.38.3 out of 10#ad We may earn a commission · Price as of October 21, 2026
The cheap-insurance layer under the whole build: sweat protection, noise damping, and a defined footprint.
- Type
- Trainer floor mat
- Coverage
- Full bike-and-trainer footprint
- Material
- Dense rubber-backed
- Job
- Sweat, noise, and floor protection
- Care
- Wipe clean
- Storage
- Rolls up
What we'd praise
- Soaks up vibration and drops the noise that travels through a hard floor
- Catches the sweat that would otherwise pit your flooring and your bike
- Rolls away when the trainer comes down for the season
What we'd flag
- A cheaper generic rubber mat does the core job nearly as well
- Won't rescue a badly wobbling trainer — it's protection, not a platform
The mat is the least glamorous line on any build list and the one people skip first, which is a mistake. It does three quiet jobs at once: it catches the surprising volume of sweat that drips off a hard indoor effort before it reaches your floor and your bottom bracket, it damps the low-frequency vibration a trainer sends through a hard floor to the room below, and it gives the setup a defined footprint so the trainer, the fan, and your shoes all live in one place.
A generic rubber mat does most of this, and we'll happily point you there in our trainer mats guide. The Saris is sized right for a bike-and-trainer footprint and built to be wiped down, which is most of what you want from the layer nobody photographs.
Good questions
Frequently asked questions
What do I actually need for a complete indoor cycling setup?
Five things: a controllable smart trainer, a fan that moves real air, a mat under it, a screen with a device to run the software, and sensors (a cadence sensor plus a heart-rate strap). The trainer is the biggest line, but the fan is the one that most decides whether you keep riding.
Where should I spend and where should I save?
Spend on the fan and the screen first, buy a good mid-tier trainer rather than a flagship, and save on the mat and sensors where generic versions do most of the job. The most common mistake is a flagship trainer in a hot, bare room. Invert that balance and the room gets used.
Is a fan really that important indoors?
Yes. Outdoors your movement creates a headwind that carries heat away; indoors there is none, so you overheat and your power sags well before your legs give out. A strong, focused fan is the single upgrade that changes a session most, which is why we rank it above spending up on the trainer.
Do I need a separate power meter if I have a smart trainer?
No. A smart trainer already estimates and broadcasts power, which is what your software reads. A separate power meter is for taking your numbers outdoors on the same bike, not for the trainer itself. Indoors, add a cadence sensor and a heart-rate strap rather than a second power source.
Can I build a good setup on a budget?
Absolutely. A budget build uses the same five parts sourced cleverly: an entry direct-drive or wheel-on trainer, a household pedestal fan, a generic rubber mat, a phone or tablet you already own, and the trainer's built-in power. It is not a compromised setup, just a resourceful one.
How we sourced this
Keep going
Read these next
- Indoor SetupPain Cave Setup Ideas
- AccessoriesThe Best Trainer Desks
- ReviewWahoo Kickr Bike Shift Review
- Indoor SetupThe Best Trainer for Zwift
- AccessoriesBest Fans for Indoor Cycling
- TrainersThe Best Smart Trainers
- Indoor SetupZwift Setup Guide
- Indoor SetupThe Apartment Pain Cave
- Indoor SetupThe Garage Pain Cave
- Indoor SetupHow to Set Up a Smart Trainer